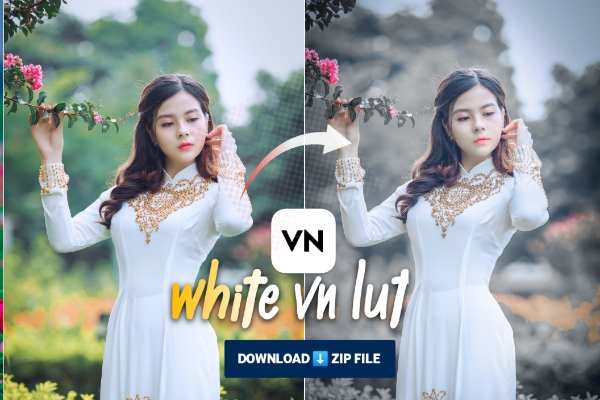
Blue Tone Lighttroom Presets - How to edit photo in Blue Tone in Lightroom. Today we will talk about this blue tone photo editing. So first of all, if you also want to edit your photo in blue tone color, then this post will be quite informative for you. In this we will tell you how to use Blue Tone Lightroom Preset. So let's start.
Photo Editing in Blue Tone -
Nowadays, photos with different types of cinematic, black, yellow, green, blue tone, filters are often seen on the social media of the Internet, which look very attractive. But do you know how this type of photo is edited. So don't worry. After reading this post today, users will be able to edit their photos in any tone.
Highlights -
Users can add perfect blue tone effect to their photos in just one click. Best method to edit photos for social media
 |
| Blue Tone Lightroom presets |
You May also like
Download best Lightroom presets
Topic cover-
- How to edit photo in Blue Tone
- About Lightroom mobile App
- Download Blue Tone DNG Lightroom presets
- File information
- Add Blue Tone effect Lightroom mobile
- Copy paste blue Tone Lightroom presets
- Blue Tone preset Advantages -
- Instruction before apply blue Tone Lightroom presets
- Conclusion
How to edit photo in Blue Tone
use Lightroom mobile App- Lightroom App is one of the best choice in Android to make photo in blue tone, in this, user will be able to do blue tone effect in photo with blue color preset in one click.
What is the Blue Tone preset and where can I find it?
Blue Tone Lightroom Preset is a DNG format of the Lightroom mobile app itself. Which has been specially designed to make the photo in blue tone.
About Dng Presets- Dng is the row format of the photo, its full form is digital negative. The setting of this row format of photography can be copied and pasted on any other photo.
About Lightroom mobile App
Lightroom Mobile App - Lightroom Mobile is a photo editing app, in which the user gets the option to color grade the photo with the help of presets. In the Lightroom mobile app, users can export all the settings they have edited as presets, and copy and paste the settings of the presets created by others into their photos. Although there are many other features in Lightroom, Lightroom Preset is the best option for editing photos in blue tones.
Download Blue Tone DNG Lightroom preset
Users can download Blue Tone Lightroom Presets by clicking on the download button given in this post. The steps to download are explained below.
Steps -
- Before downloading, make sure that the internet is working properly or not.
- Check your phone storage if the storage is not full.
Blue Tone Lightroom Preset will automatically start downloading as soon as the user clicks on the download button.
File information
File name : Blue Tone DNG Lr preset
Type : photo colour Grading
Format : DNG
Quantity : 1
Size : 24 MB
This Lightroom preset, we have created by editing ourselves and any user can download and use it.
Add Blue Tone Lightroom presets in Lightroom mobile
To add Blue Tone Lightroom Preset. Follow the steps given below.
1. First of all, open the Lightroom mobile application in the background and then open your gallery app. Here the Blue Tone Lightroom Preset downloaded by the user will be found. Now share that Lightroom Preset on Lightroom mobile app. To share, click on the share icon or go to the option of 3 dot and select the share option.
2. Now the way you have shared Preset on Lightroom app. In the same way, share your photo on Lightroom, which photo you want to edit in blue tone.
3. Now go to the Lightroom app running in the backgrond, here you will find the photo/preset you have added.
Copy paste blue Tone Lightroom presets
Now to copy the setting of Lightroom blue tone. Added - Open Blue Tone Presets. To copy the seating, go to the 3 dot in the top right corner, and then select the copy seating option. Now the setting of the preset has been copied.
Paste setting on you photo
Now open your photo which you added on Lightroom to edit. After this, go to the 3 dot option again and select the paste setting. Finally the blue tone Lightroom preset is applied to the photo.
Watch video Tutorial-
Blue Tone preset Advantages -
Blue Tone Lightroom preset is easy to use, and users will also be able to customize this Blue Tone preset according to their photos. User can edit any of his photos in blue tone. This blue tone preset also enhances the quality of the photo, and makes the photo high definition. Photos of blue tone presets look very attractive on social media, and people like these types of photos very much
What to do if the blue Tone presets don't work properly.
So in such a situation, we will suggest you to always apply the preset on the photo of natural color, or use the adjustment tool. With the adjustment tool, you can adjust the brightness, saturation, exposure, noise, of the photo. And then apply the presets.
Conclusion -
In our opinion user should definitely use this blue tone Lightroom preset. Because using them is many times better than editing them manually. So, tell us how did you like this post. If you have any suggestion related to the post then comment us. We will meet again with the new post till then. Have a nice day


1234567890
ReplyDeletekalim##########@@786
ReplyDeleteKya likh rahe ho bhayi
DeletePublsh
ReplyDelete